In
this blog post, we will briefly outline the main options available in
Odoo for paying vendor bills. Version 17 has introduced functions
that make the payment of liabilities more efficient, relieving the
burden on accounts payable. This is another compelling reason for the
integrated accounting Odoo offers!
Basic information on vendor bills in Odoo
First and foremost, it is essential to separate
possible business cases. We need to determine whether we have an
invoice already posted, i.e., whether we want to settle our
recognized liability with the payment or whether it is an advance
payment. The latter implies that an exchange of services has not yet
occurred and that the vendor will only fulfill their obligation under
civil law by Section 433 BGB (Fulfilment Transaction) after receiving
the payment. However, this article will focus primarily on paying
posted vendor bills since these cases represent the standard
application.
Filtering and grouping vendor bills in Odoo
We recommend first identifying the vendor bills to
be paid in the invoice receipt journal by using suitable filters and
grouping them accordingly, such as according to due dates,
currencies, banks, or partners. The filters should be targeted and
earmarked for a specific purpose. Creating corresponding favorites is
an effective means of doing this, as they may also be used for future
payment runs. Using needs-based and standardized favorites has proven
to significantly improve work processes. The favorites’ filters or
groupings may also be easily shared with colleagues.
Creating payments
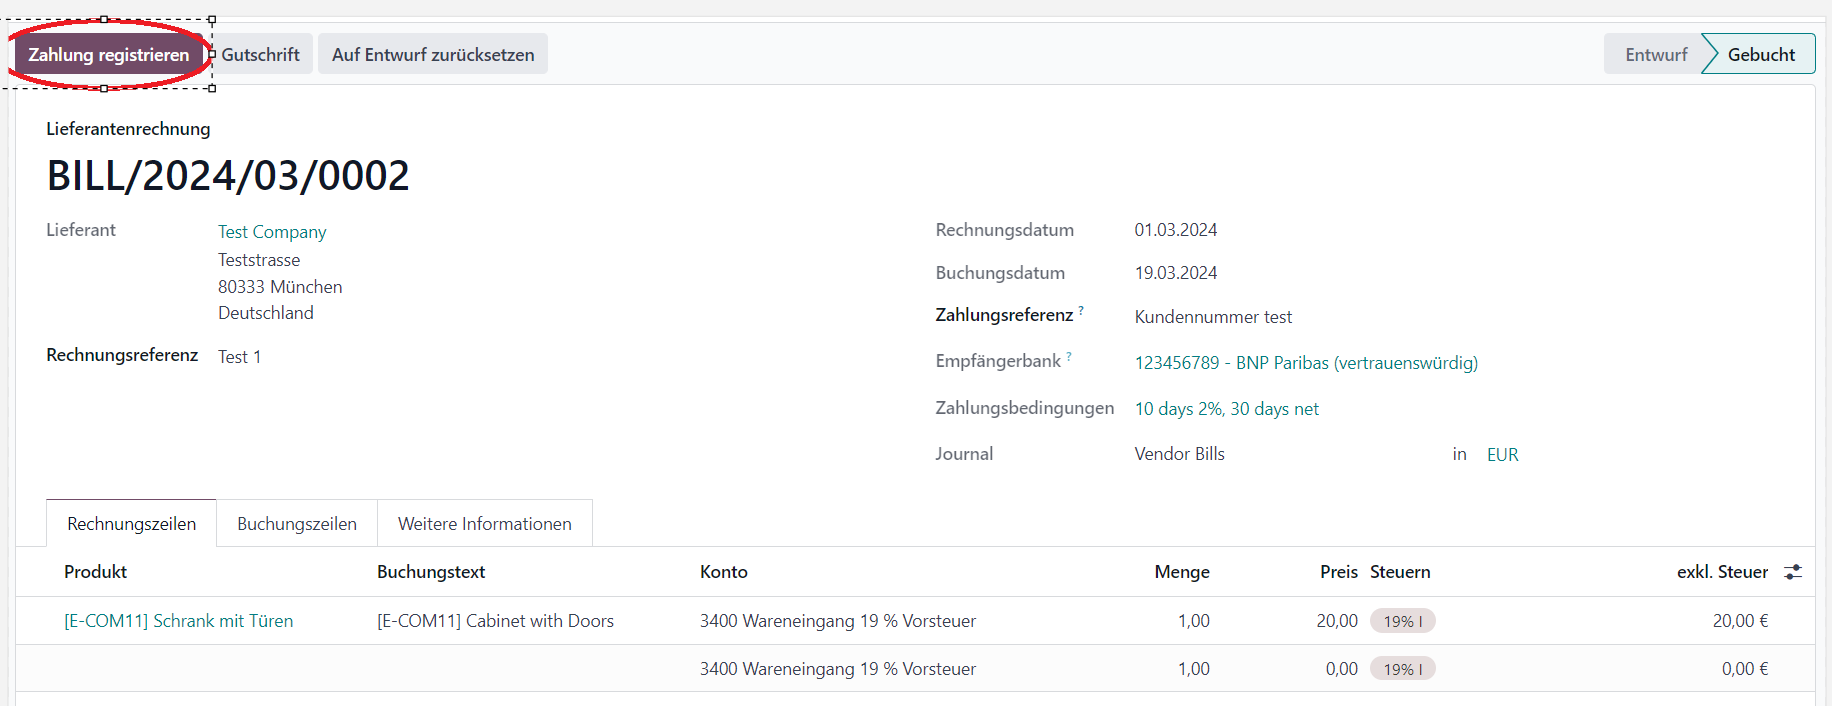
To execute a single payment, you can access it through the invoice process by clicking the “Register Payment“ button at the top left of the menu bar.
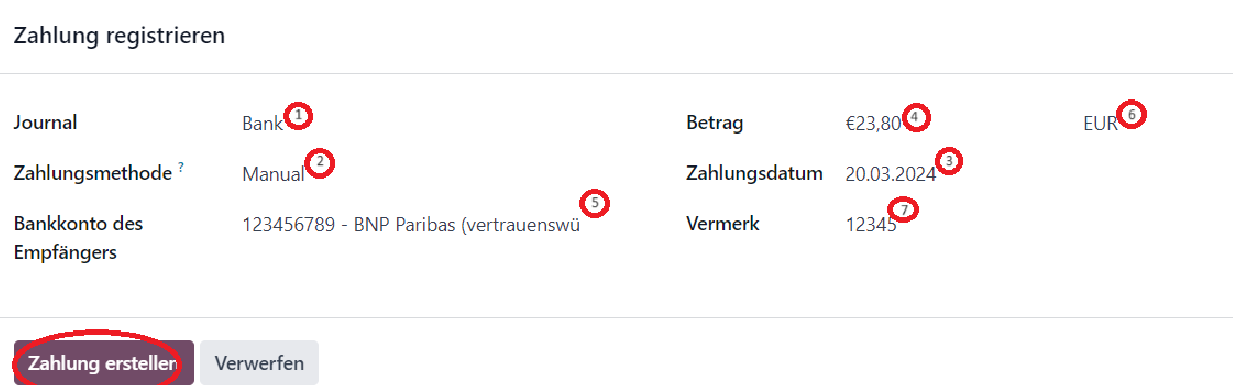
In the payment wizard that opens automatically, you can define the payment details such as payment method 2 (SEPA or manual) and date of payment 3. Here, you also have the option to reduce invoices by decreasing the amount 4. If the company has multiple business accounts or even banks, you may select the account relevant for payment through the Journal1 field. The recipient bank 5 is automatically drawn from the vendor master data. New in Odoo 17 is the ability to make payments in a different currency 6. If no separate payment reference has been entered during invoice input, the vendor invoice number will be taken as the purpose 7 of use.
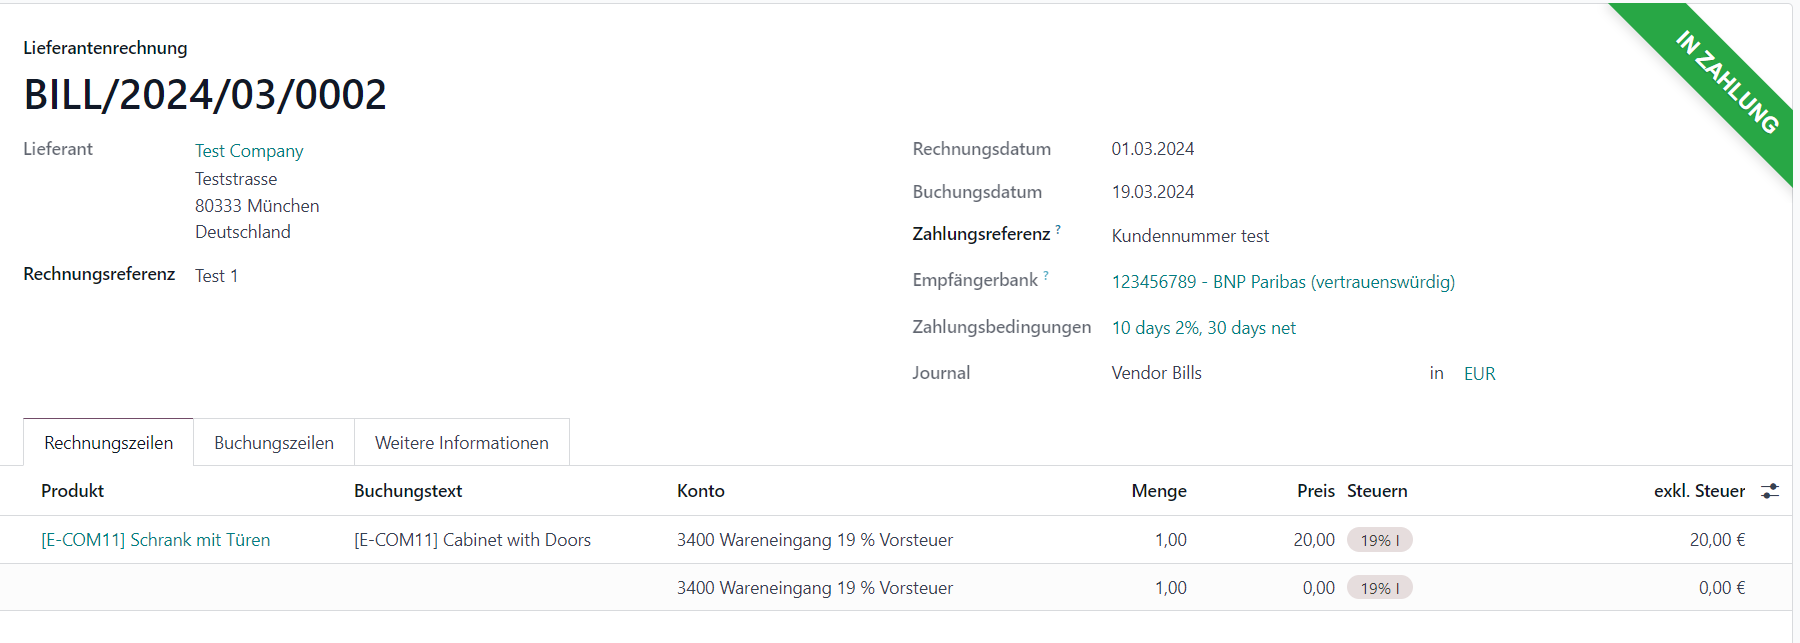
Upon confirming the process by clicking the “Create Payment“ button, a booking is automatically generated in Odoo. The liability is transferred to an interim account (Outstanding Payments), and the invoice is set to the “In Payment” status.
The amount will remain in the interim account
until the payment is actually made and recorded in the account
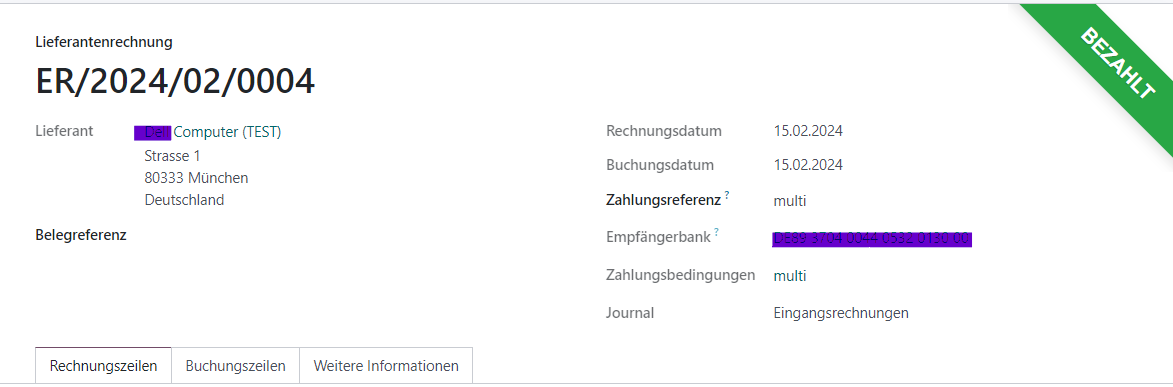
statement. By booking the account statement in the Odoo bank
transaction journal, the entry on the interim account is reversed so
that the liability is completely canceled from the books, and the
invoice status changes to “Paid.”
Unique feature – Cash discount
Odoo
will check the payment terms stored in the partner master data and
automatically reduce invoice amounts in the case of timely payments.
Yet, even when payment terms are exceeded, it is always possible to
make manual deductions for invoices. We address the specifics of cash
discounts in our blog post
“Automatic Posting of Vendor Discounts – What to Watch Out For. “
and show how to input pre-tax corrections for posting cash discount
income, which is automated in Odoo.
Batch payments in Odoo
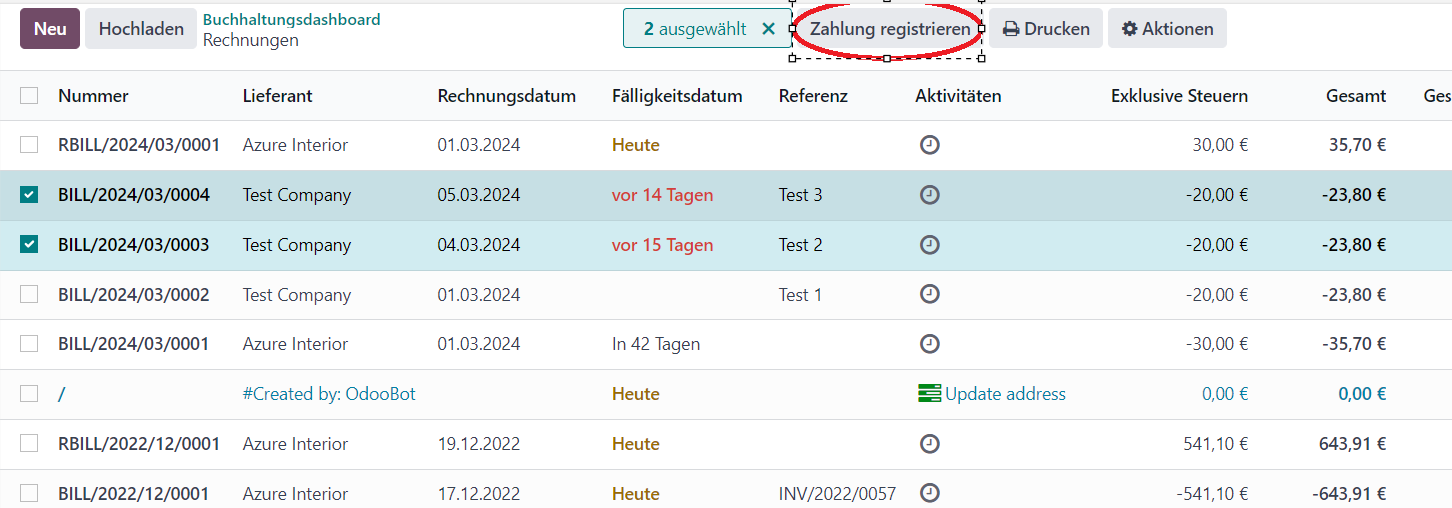
Of course, you can also create batch payments to authorize several vendor invoices simultaneously. And you can make payment proposal lists for collective payments. First, select the corresponding documents, either as described above, in the invoice itself, or directly in the invoice receipt journal. To do this, put a checkmark in the respective box in front of the invoice to be paid.
As
soon as all invoices – or even just one – have been selected
using the checkmarks, click the “Register Payment“ button. For
the button to appear, at least one invoice must have been selected
using the checkmark.
As soon as the payments have been registered here, too, the payment wizard will open, as described above, with an additional function, “Group Payments“.
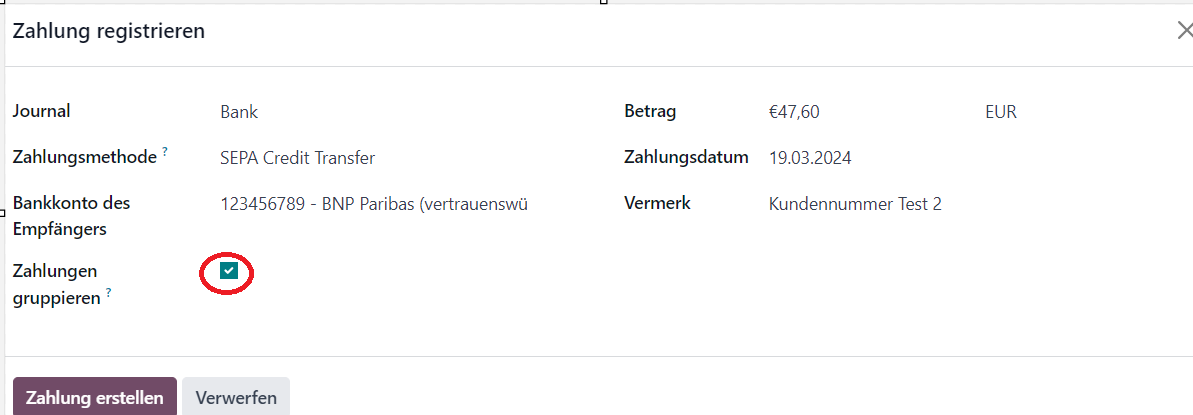
If a checkmark is set here, the payee will receive a total amount on their account statement, which may consist of several payments. This is the case, for example, when several vendor invoices are paid to the same creditor (vendor). If no checkmark has been set, the payee will receive several payments because the invoices are transferred individually and not in one sum. By clicking “Confirm Payment, “ the liabilities here will also be transferred to the interim account (Outstanding Payments), and the invoices will be set to “In Payment“ status.
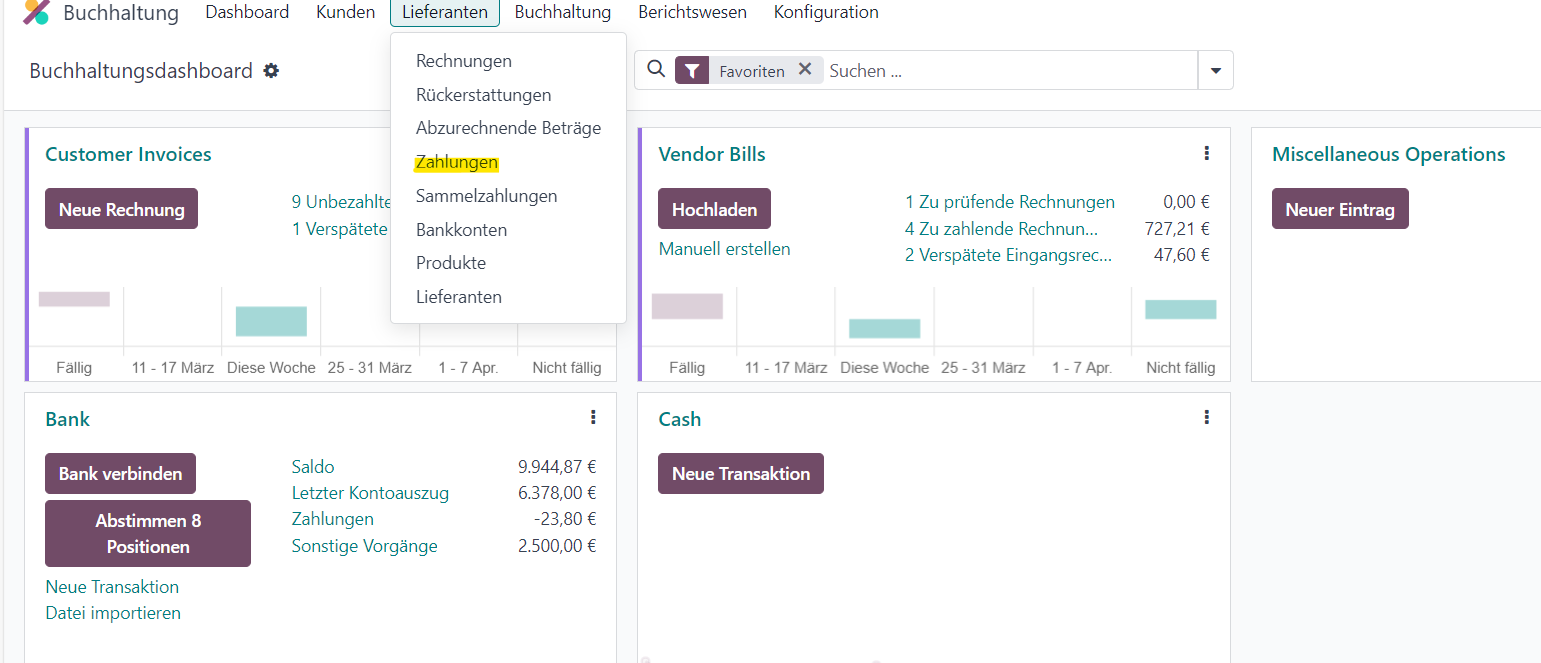
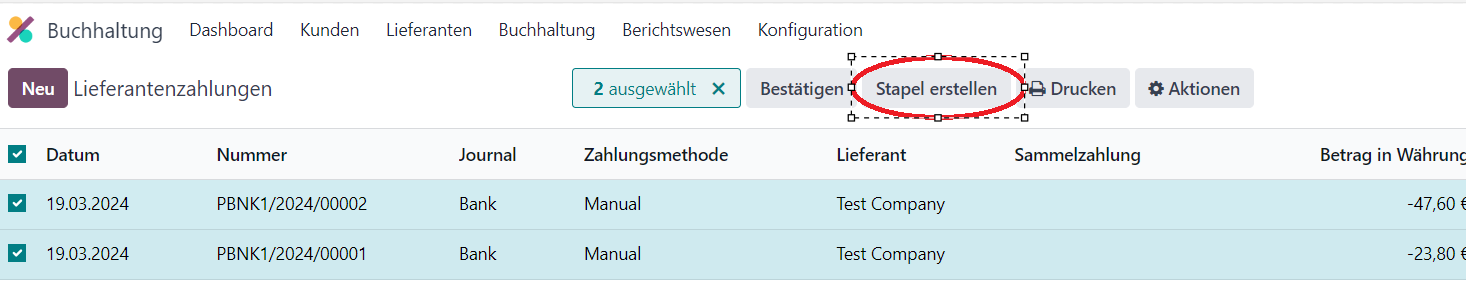
The
batch can either be created in the Vendors / Payments menu or the
Vendors / Collective Payments menu. In the first case, use the
checkmark box to select the invoices that are eligible for the
respective collective payment and confirm the process by clicking
“Create Batch. “
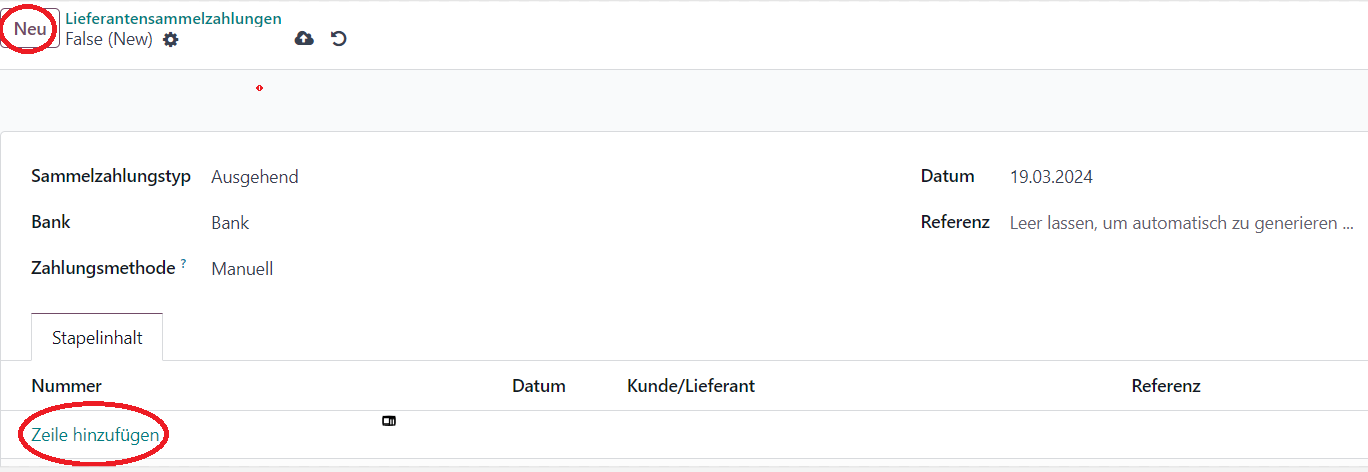
If you choose the second option, to create the batch payment from the Supplier Payments menu, you first need to create a new batch. The next step is to confirm the bank previously selected during payment registration. Under “Add Line, “collect all invoices to be assigned to this batch.
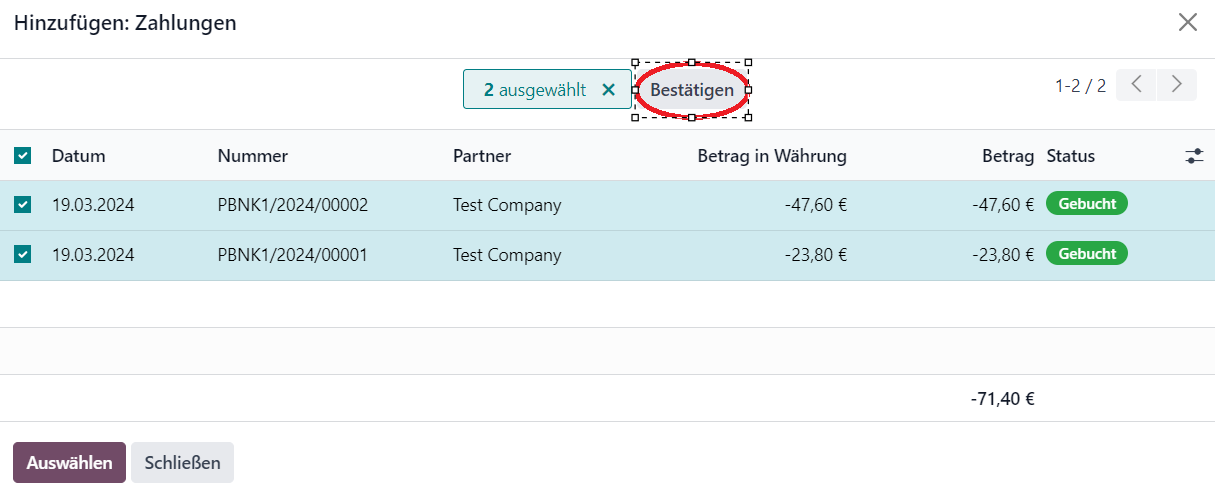
Regardless of the menu from which the batch has been created, the same applies in both cases: “Confirm” generates a payment file that may be sent electronically to the house bank to execute the payments.
You can create as many batch payments as you like, for example, separately for domestic and international, SEPA or manual payments, different currencies, or even vendors.
Was this article helpfull information to you?
Would you mind to leave us a review of your experiences with openfellas?