Odoo Version: 16 Enterprise
Hintergrund
Guter Kunde – nicht so guter Kunde, wer hat die nicht. Wie also lege ich in Odoo einen Kunden an, so dass der Kollege im Vertrieb weiß, was zu tun ist, und wie genau funktioniert der Vorkasse- und Anzahlungsprozess – und ist es das Gleiche oder gibt es einen Unterschied?
Diese Fragen kommen natürlich regelmäßig, und wer auf YouTube sucht, bekommt zwar viele Informationen, doch bislang habe ich kein Video gefunden, das einen Vorschlag für einen Prozess von der Datenanlage bis zur finalen Abrechnung führt.
Wichtig dabei zu wissen ist, dass die Bestätigung eines Angebots in Odoo der Auslöser für die Generierung der Lieferungen ist (interne wie externe, sollte es mehrstufige Lagerprozesse geben). Diese wiederum können die Neuberechnung des Bedarfs und eine entsprechende Rückmeldung innerhalb der Module Einkauf und ggfls. Fertigung zur Folge haben.
Damit steht die Frage im Raum, ob wir -Option 1 - eine Zahlung vor einer Lieferterminplanung und -bestätigung voraussetzen wollen (Vorkasse) oder – Option 2 – genug Vertrauen in den Kunden haben, so dass eine Anzahlung zeitgleich zur Lieferplanung laufen kann (Erstellung einer „Kaufmannsrechnung mit Fälligkeit“).
Option 1 wird üblicherweise als Vorkasse oder Proforma-Prozess bezeichnet, Option 2 als Anzahlung.
Diese Entscheidung ist nicht nur für die Konfiguration und die Erzeugung der Lieferungen wichtig. Auch der Zeitpunkt und das Zustandekommen des juristischen Vertragsabschlusses unterscheidet sich.
Im Proforma-Prozess (Vorkasse) schicken wir eine Proforma-Rechnung an den Kunden. Diese stellt ein Angebot dar. Durch die Zahlung nimmt der Kunde das Angebot an. Die Zahlung ist also die „Willenserklärung“ des Kunden, durch die es zum Vertragsabschluss kommt.
Die Erstellung der Anzahlungsrechnung setzt bereits die Willenserklärung bzw. den Vertragsabschluss voraus.
Konfiguration
Der erste und wohl wichtigste Punkt ist die Trennung der Debitoren nach eben diesen beiden Kategorien.
Wie wir aus dem Beitrag der Monatsrechnungen bereits gelernt haben, kann über die Zahlungsbedingungen deutlich mehr abgebildet werden, als der Begriff selbst vermuten lässt, besonders da a) es einen Unterschied in der Begrifflichkeit intern und auf dem anzudruckenden Text macht und b) die Standard-Zahlungsbedingung gut sichtbar bei der Angebotsanlage ausgewiesen wird.
Die Separierung zwischen internem und externem Text sollte man sich unbedingt zu Nutze machen, indem man nicht nur den Namen der Zahlungsbedingung (oder vielleicht sogar ein Kürzel) setzt, sondern auch gleich mit Anweisungen an den internen Benutzer versieht (z.b. „Nur auf Vorkasse, 30 Tage“ oder „30% Anzahlung, 30 Tage“).
In diesem Fall ist es am praktischsten, zwei weitere Zahlungsbedingungen anzulegen. Wir können diese ganz einfach erstellen, in dem wir die Standard-Zahlungsbedingung duplizieren/kopieren. Damit werden automatisch alle Einstellungen und Übersetzungen direkt übernommen.
Für den Beispielfall sollte das ausreichend sein. In der Realität können natürlich weitere Hinweise zum Ablauf der Zahlung in den externen Text integriert werden. So sieht der Kunde schon bei Erhalt des Angebotes, dass er nach der Beauftragung eine Anzahlung bzw. Vorkasse zu leisten hat.
Hinweis: Die Standard-Zahlungsbedingung sollte ganz oben in der Liste stehen.
Hier ein mögliches Beispiel:
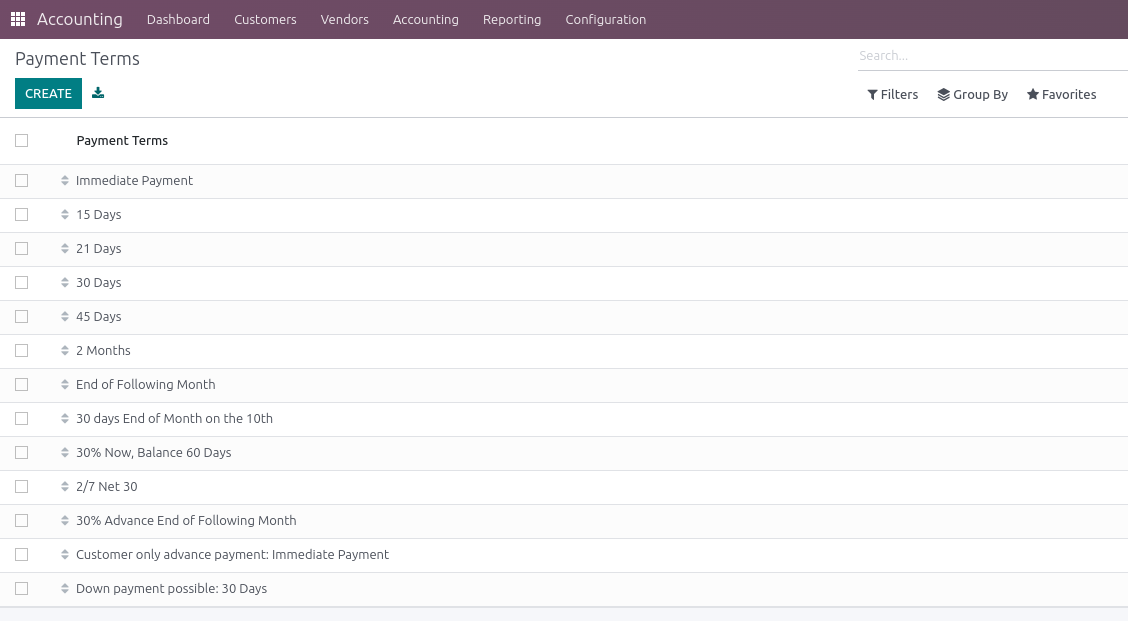
In diesem Beispiel wurden die unteren beiden Bedingungen neu angelegt. Dabei habe ich eine Kopie der „sofortigen Zahlung“ sowie „der 30 Tage Netto“ erstellt. D.h. auf den Belegen wird kein Unterschied erkennbar sein, die Formulierung soll dem Kollegen im Vertrieb jedoch einen Hinweis darauf geben, wie mit dem Kunden zum Zeitpunkt der Auftragserteilung umzugehen ist.
Stammdaten
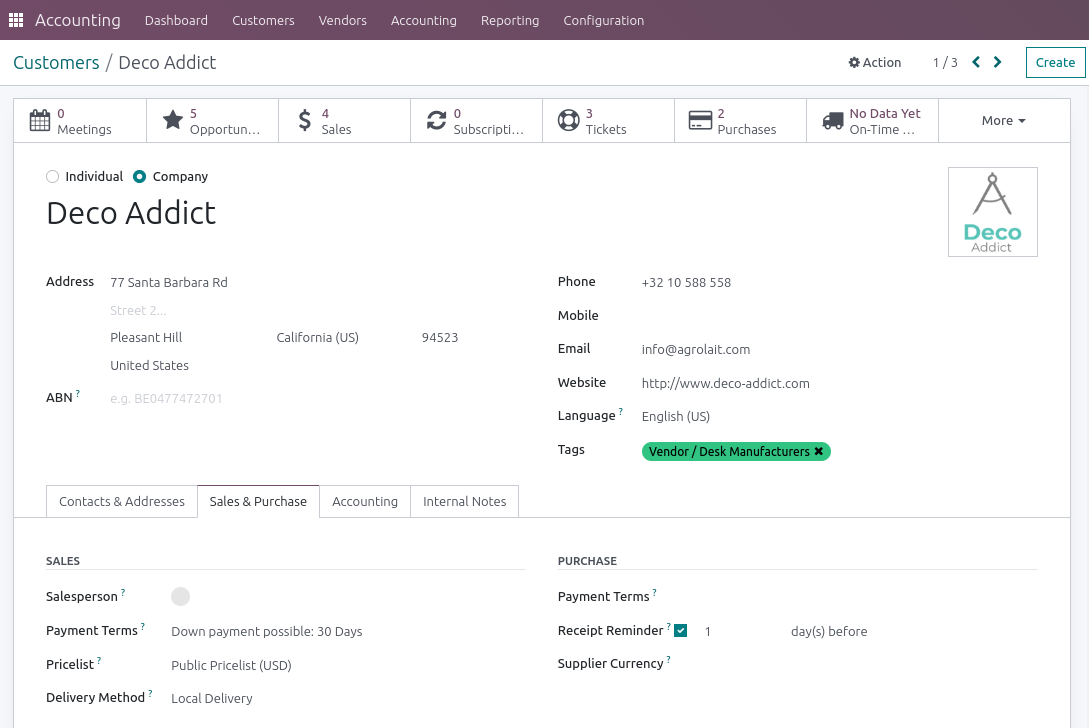
Im nächsten Schritt sollten die neu angelegten Bedingungen auch mindestens jeweils einem Kunden zugewiesen werden.
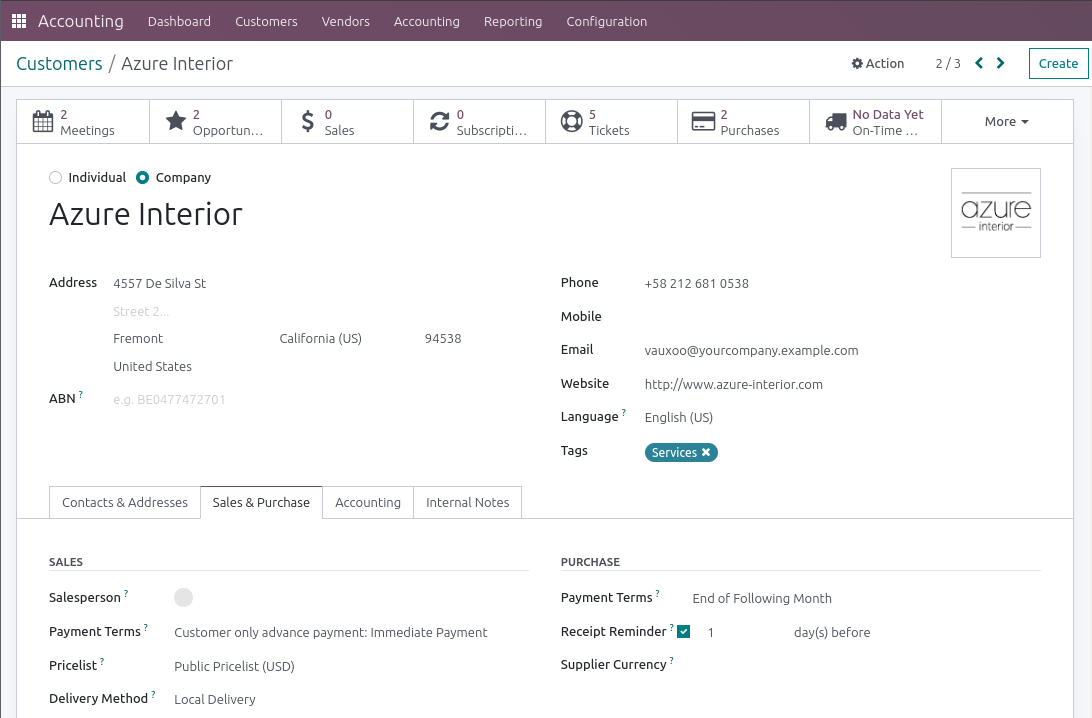
In diesem sehr fiktiven Fall ist Deco Addict der Kunde, den wir positiv geprüft haben und dem wir demnach vertrauen. So kann die Lieferung direkt nach der Bestätigung des Auftrags geplant und die Anzahlungsrechnung erstellt werden. Bei Azure Interior hingegen ist die Bonitätsprüfung negativ ausgefallen, demnach kann der Auftrag erst nach Leistung einer Vorkasse bestätigt werden.
Die Zahlungsbedingung wird im Stammdatensatz entsprechend hinterlegt:
Kommen wir nun zu den beiden Vorgängen selbst.
Prozess Anzahlung
Wir erhalten eine Anfrage von Deco Addict. Hier wird im Vertrieb ein Angebot angelegt. Nachdem der zuständige Verkäufer die Bestellung erhält und in Odoo geht, sieht er anhand der Zahlungsbedingung, dass der Auftrag bestätigt und eine Anzahlungsrechnung erstellt werden kann.
Dabei geht er wie folgt vor:
Schritt 1: Auftrag bestätigen
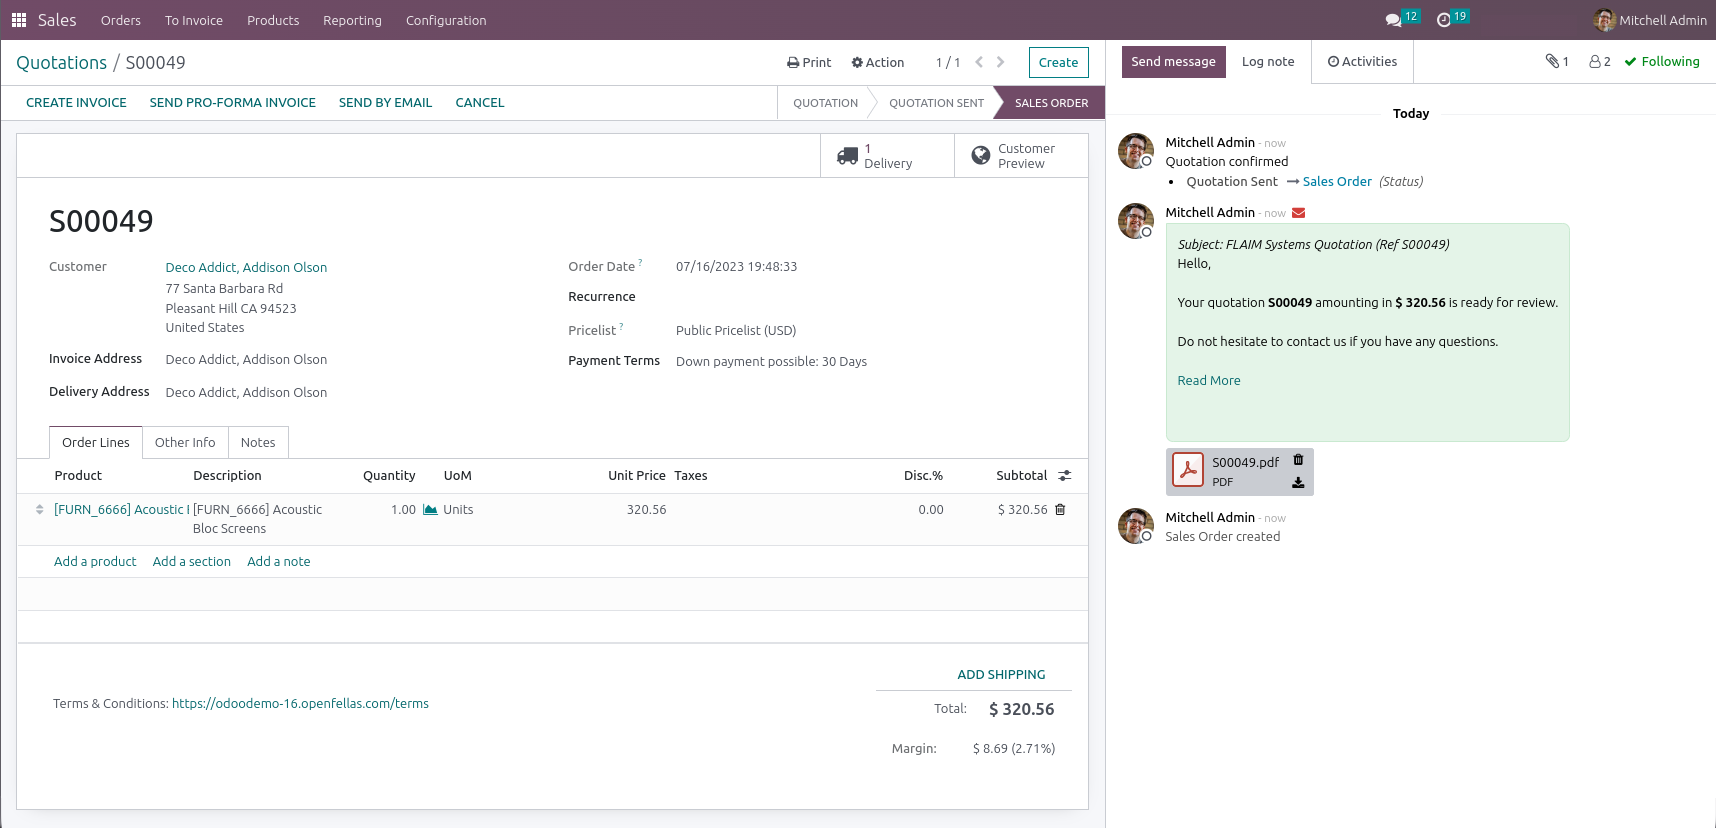
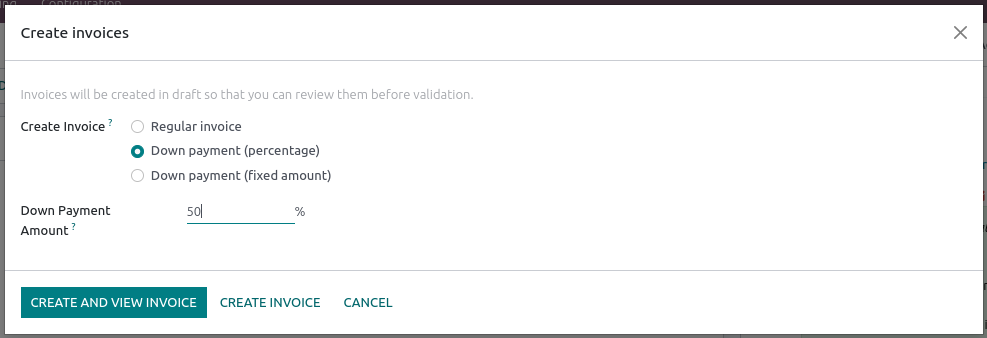
Die Beauftragung erfolgte telefonisch; das Angebot wurde verschickt. In der Zahlungsbedingung erkennen wir, dass nun eine Anzahlung erstellt werden soll. Das Beispiel zeigt, dass der anzuzahlende Prozentsatz am besten schon in der Benennung hätte hinterlegt werden sollen. Nehmen wir einfach 50% an.
Schritt 2: Rechnung erzeugen und Anzahlung erfassen
Um die Anzahlung zu generieren, klicken wir auf den Knopf „Rechnung erstellen“:
Damit kommen wir zum Rechnungsentwurf:
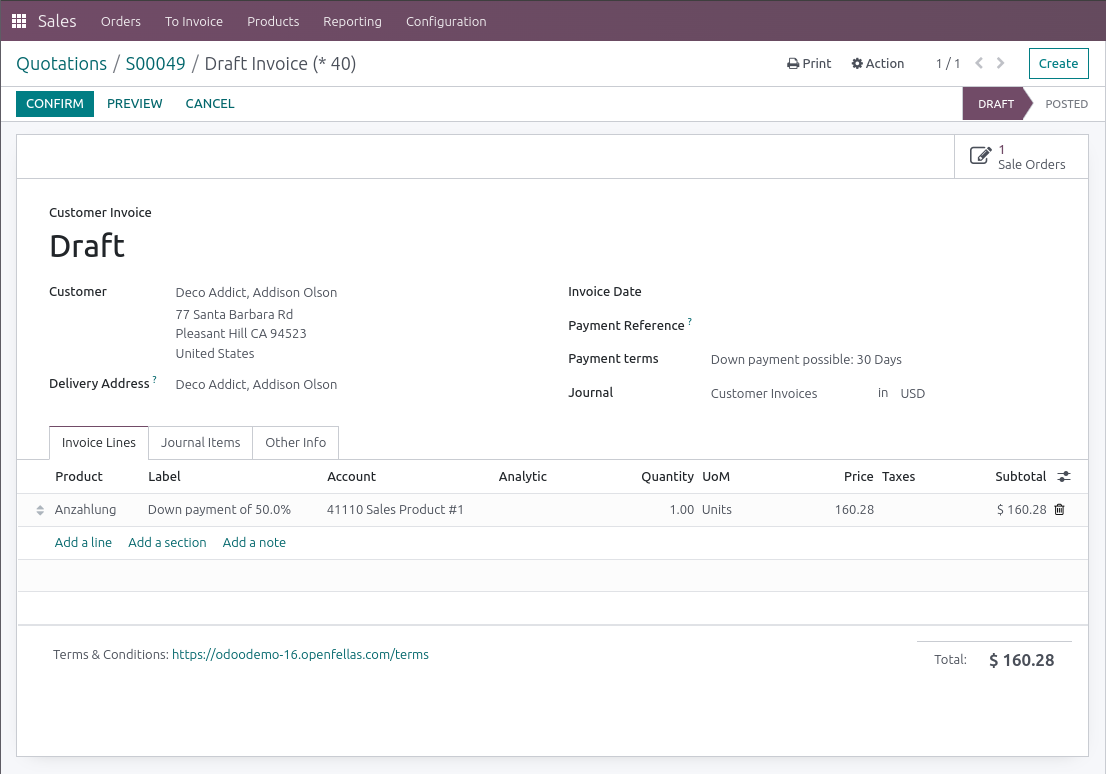
Für den Benutzer im Verkauf wäre der Prozess hier vorerst zu Ende, da bei korrekter Einstellung der Berechtigungen der Vertrieb zwar Rechnungsentwürfe erstellen bzw.anfragen, aber natürlich nicht verbuchen darf. Dies sollte nur von der Buchhaltung durchgeführt werden.
In diesem Beispiel sind wir Admin und gehen die nächsten Schritte nahtlos weiter.
Schritt 3: Verbuchung der Anzahlungsrechnung
Der nächste Schritt wäre die Verbuchung. Dazu einfach auf den Knopf „Bestätigen“ drücken und wir erhalten eine Rechnungsnummer. Das Datum wird auf den aktuellen Tag gesetzt.
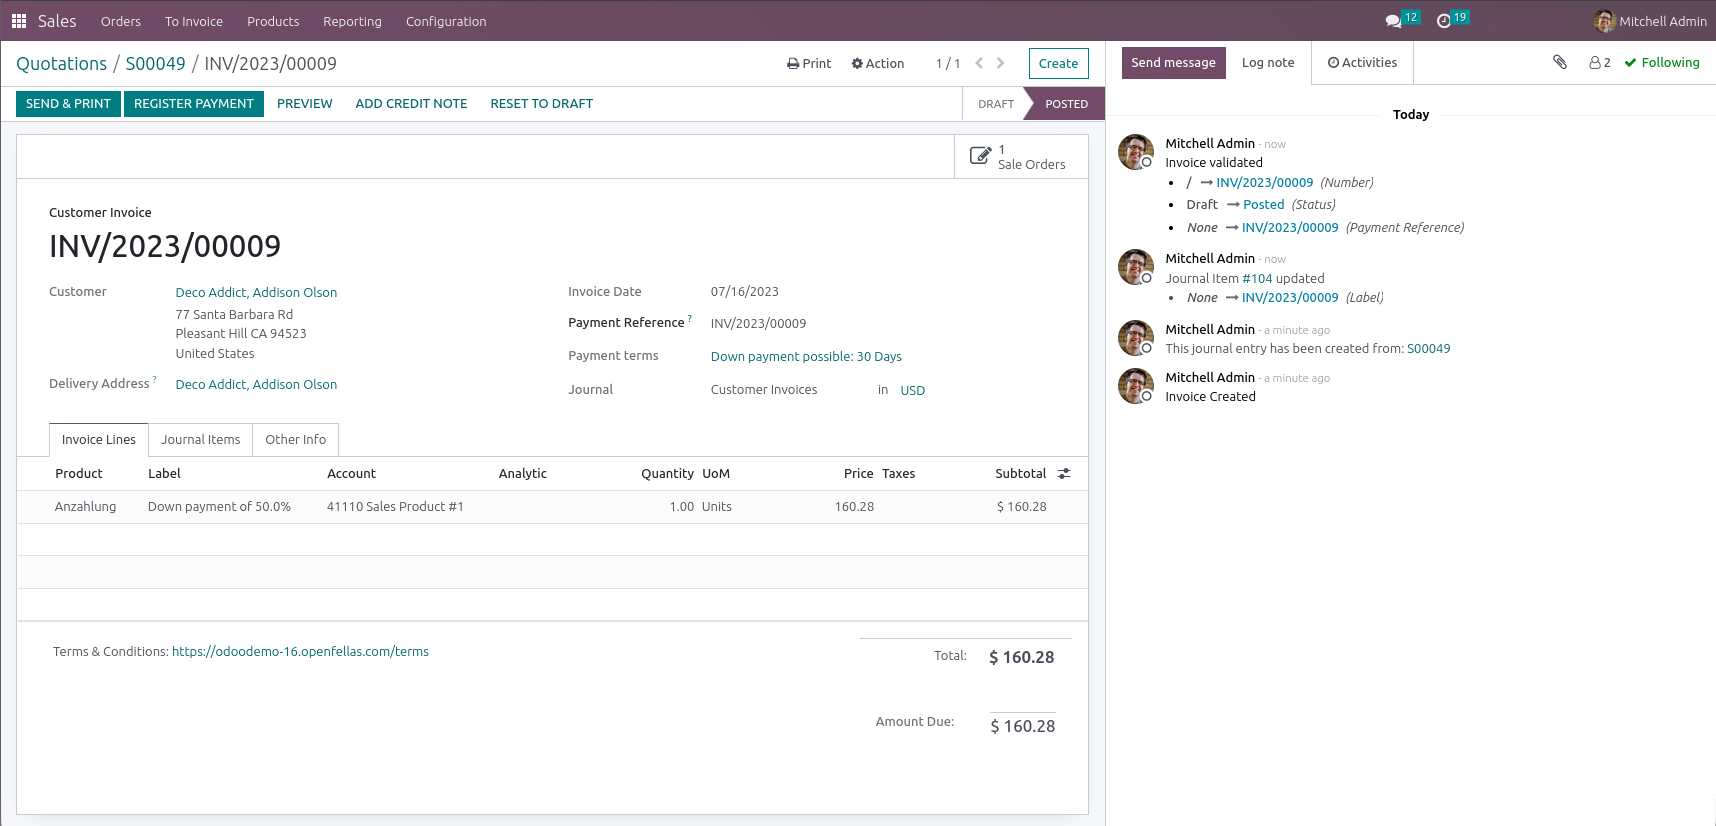
Über den Knopf „Senden & Drucken“ wird ein Belegbild erzeugt, und die Rechnung kann per E-Mail versandt werden.
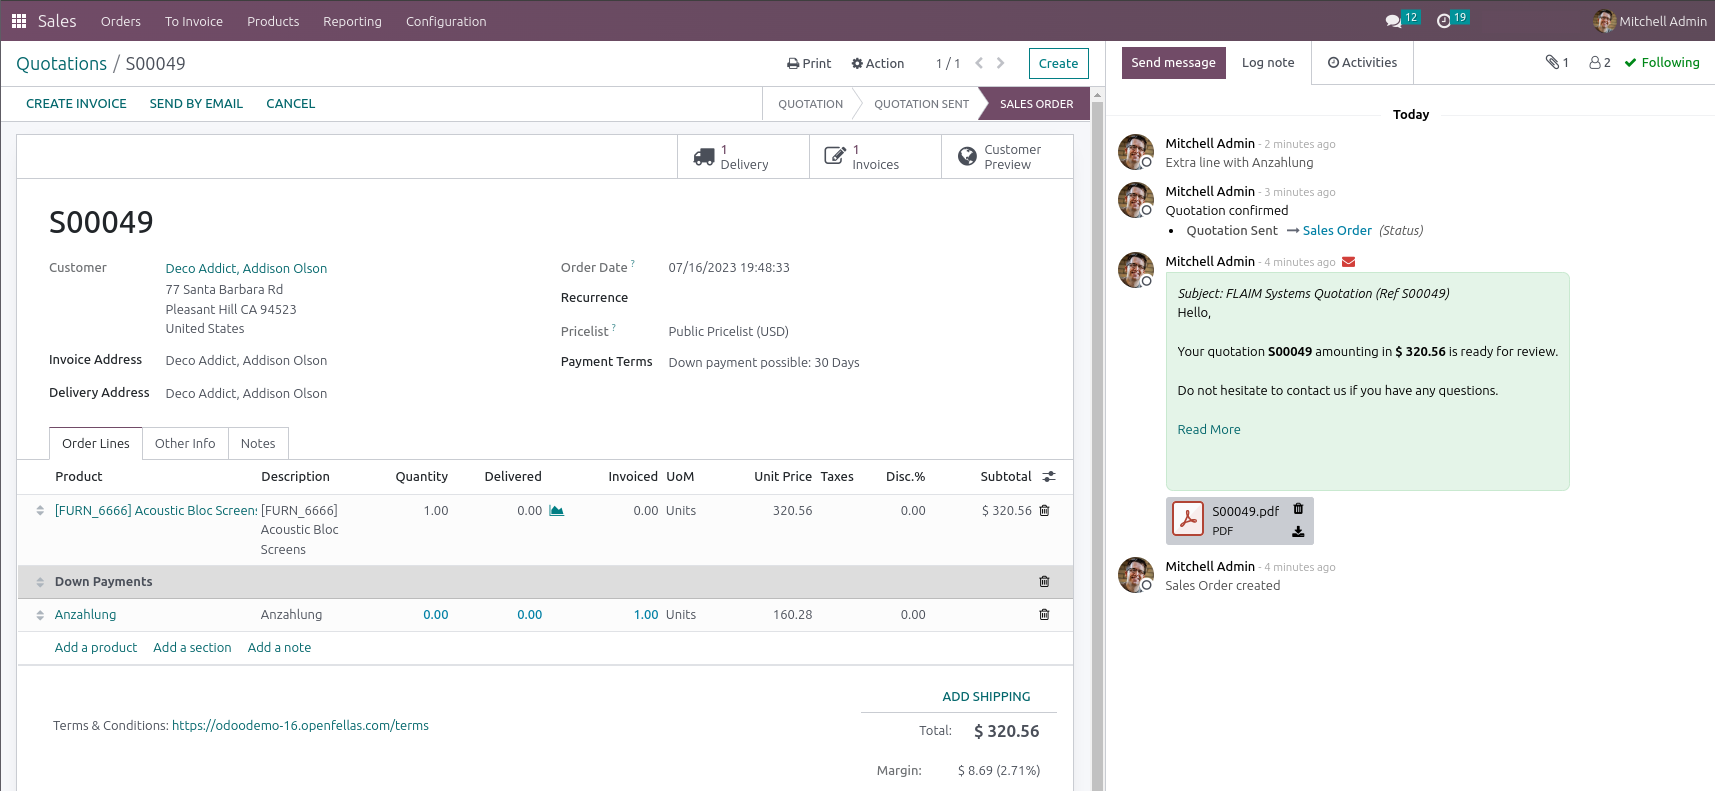
Im Verkaufsauftrag ist die Anzahlung nun ebenfalls sichtbar:
Schritt 4: Versand und Schlussrechnung
Nun erfolgt der Versand, wodurch Odoo den Auftrag in den Rechnungslauf stellt. Wird nun der Auftrag ebenfalls in eine Rechnung überführt, schaut das Ergebnis wie folgt aus:
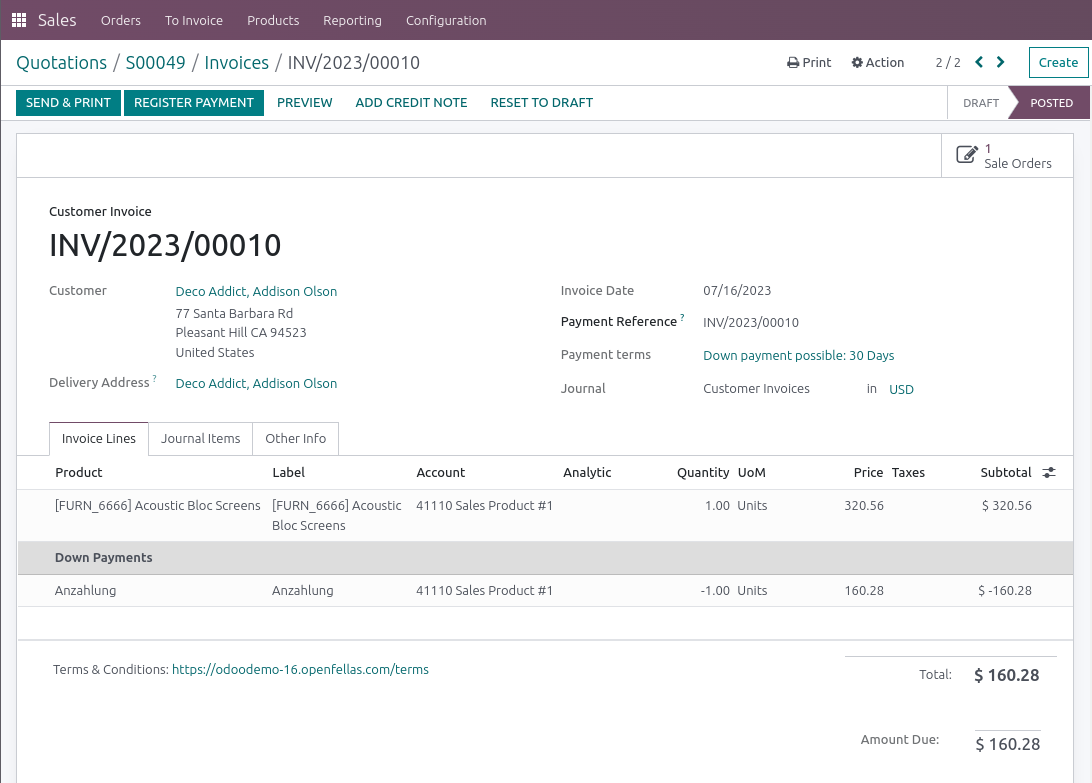
Wie man sieht, wurde die Anzahlung mit aufgeführt und reduziert den abzurechnenden Betrag.
Prozess Vorkasse
In Fall der Vorkasse erstellen wir ein Angebot für Azure Interior. Nach dem Versand des Angebotes erhalten wir die Beauftragung. Hier sehen wir nun, dass vor der Lieferplanung eine Vorkasse zu leisten ist. Dazu versenden wir über den Knopf „Proforma senden“ die Proformarechnung mit der Bitte um Zahlung.
Schritt 1: Versand Proformarechnung
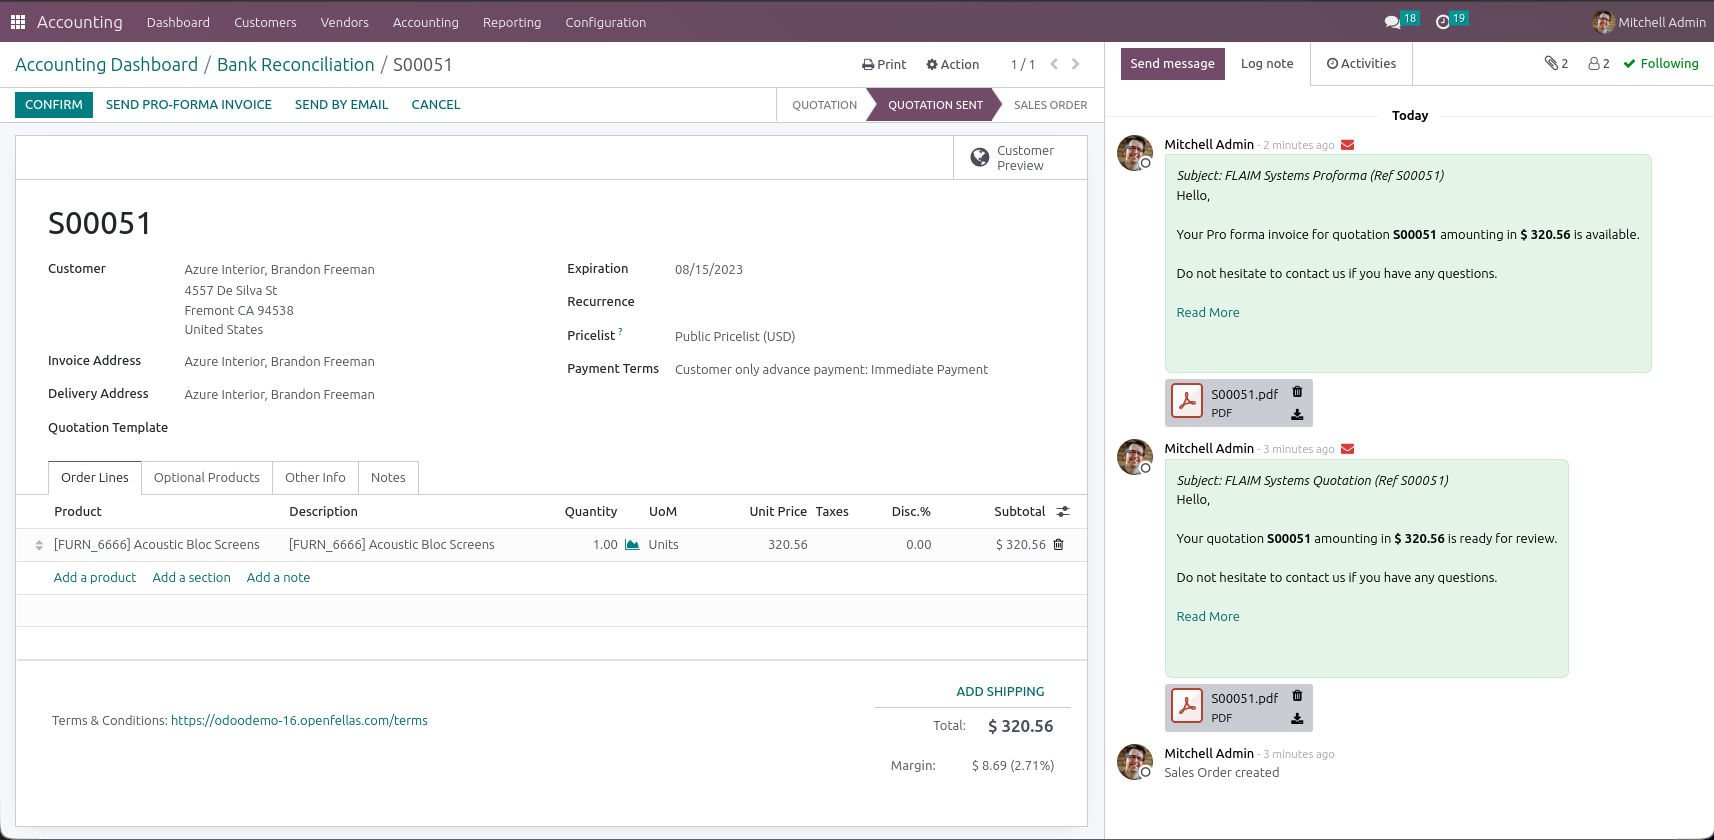
Das Angebot wurde erstellt und Azure Interior zugeschickt.
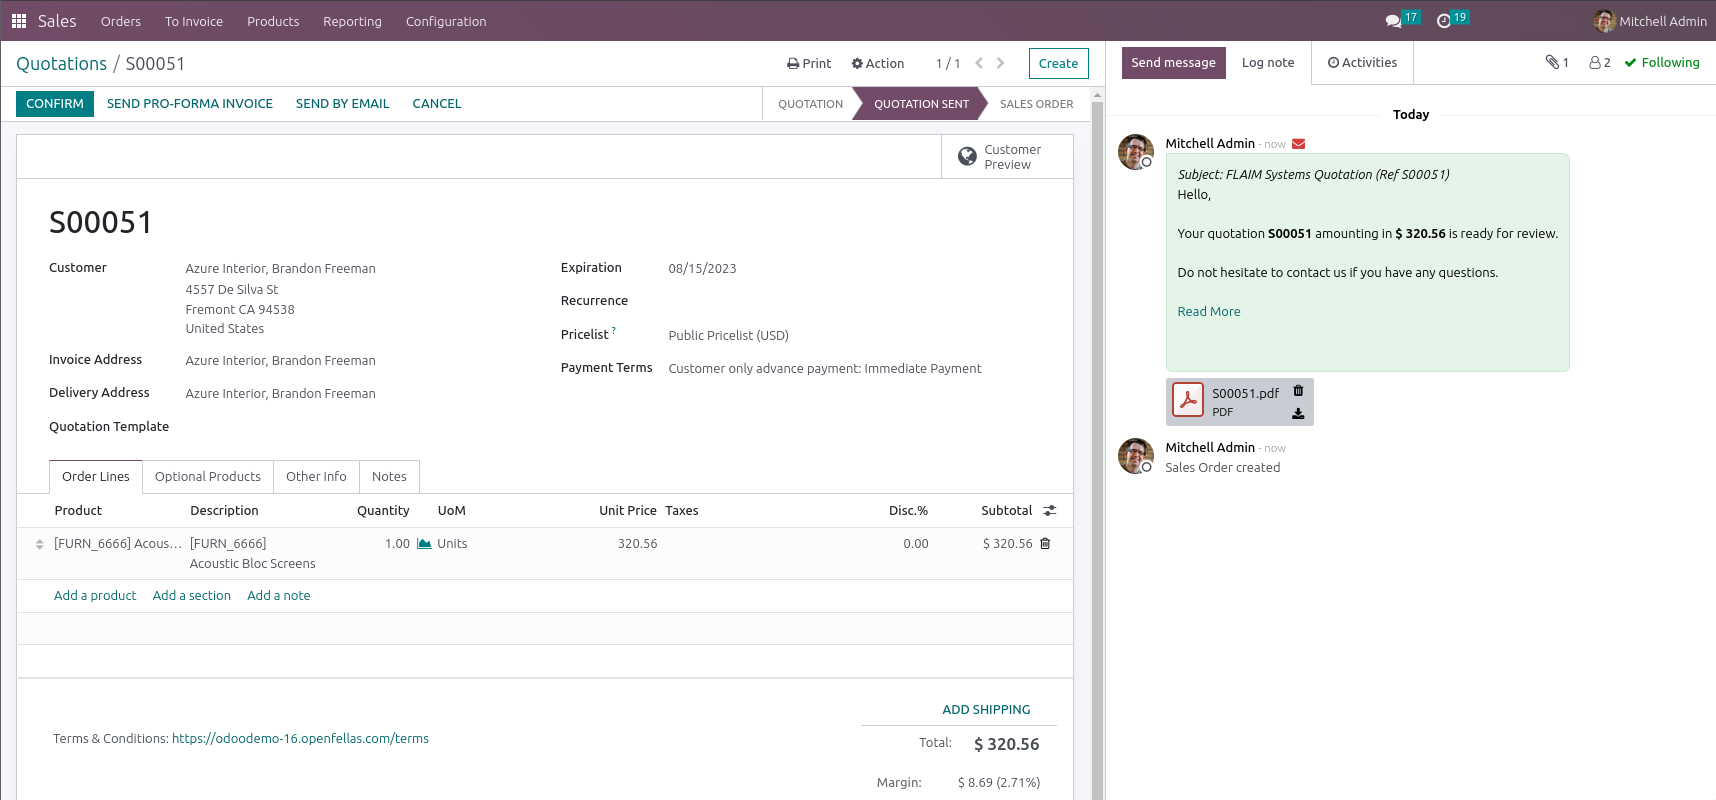
Nun meldet sich Herr Freeman bei uns und erteilt den Auftrag. Wir sehen sofort, dass der Kunde auf Vorkasse gesetzt worden ist. Also senden wir ihm die Proforma über den Knopf „Proformarechnung senden“ zu.
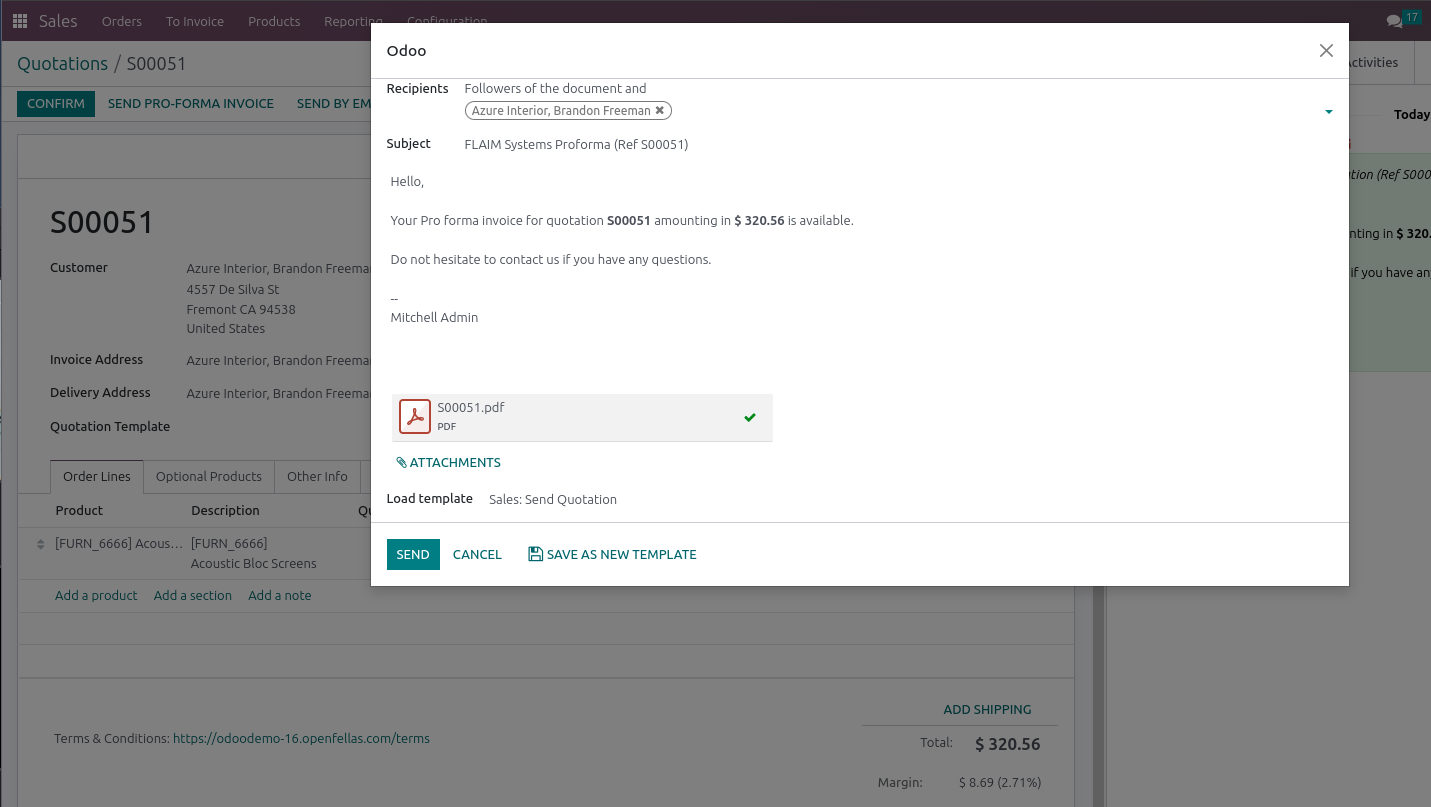
Es wird ein Standard-Vorlagetext in die E-Mail geladen, der a) vom Administrator angepasst und b) darüber hinaus vom Benutzer vorgangsbezogen individualisiert werden kann.
Damit wäre die Arbeit vom Vertrieb soweit erledigt und der Ball liegt beim Kunden.
Schritt 2: Erfassen der Zahlung auf dem Bankauszug
Nun wechseln wir wieder die Rolle, denn ab nun geht es in der Buchhaltung weiter, denn die Zahlung taucht jetzt im Bankjournal auf.
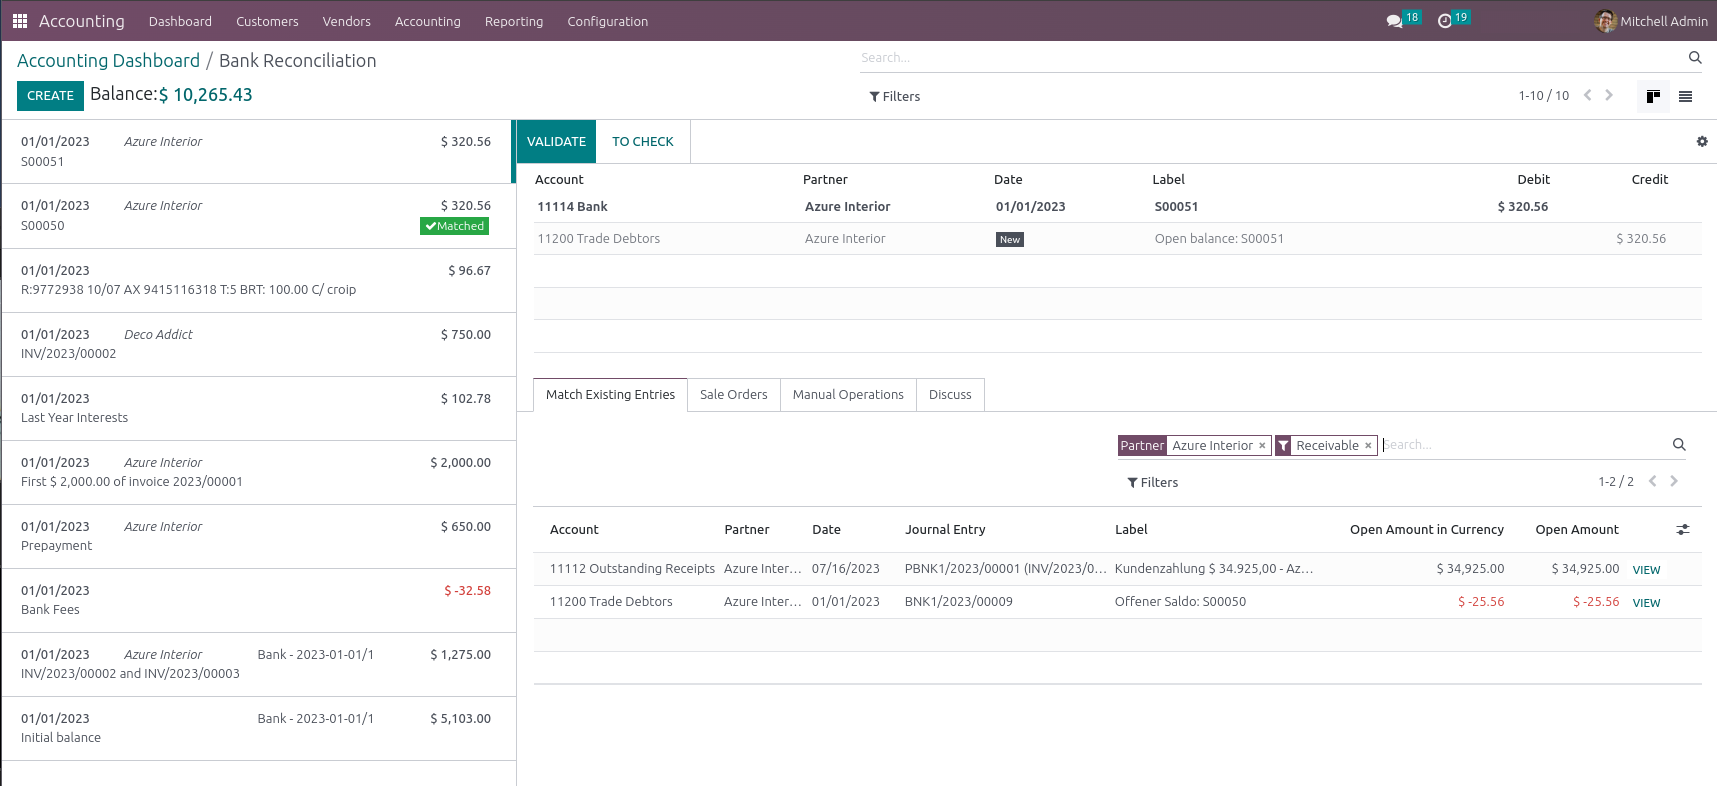
In unserem Fall hat Azure den vollen Betrag von 320,56 Dollar bezahlt und als Zahlungsreferenz die Angebotsnummer verwendet.
Wer genau hinschaut, sieht hier einen zusätzlichen Reiter „Aufträge“ in den Verbuchungsvorschlägen. Dieser Reiter wird nur angezeigt, wenn in der Zahlungsreferenz Angebots- oder Auftragsnummern erscheinen. Klickt man auf diesen Reiter, so erhält man einen Link auf die offenen und versendeten Angebote:

Klicken wir auf den Link, landen wir in unserem Angebot, zu dem der Proformabeleg versendet worden ist.
Schritt 3: Bestätigung des Angebots
Natürlich entscheidet sich nun, ob man die Zahlung in der Höhe akzeptieren möchte oder nicht. Sollte die Anzahlung nicht ausreichend hoch ausgefallen sein, so empfiehlt es sich, den verantwortlichen Verkäufer über eine interne Notiz oder Wiedervorlage zu kontaktieren und über die Erfassung der Zahlung zu benachrichtigen. Hier bleibt das Angebot in dem Status, in dem es aktuell ist und man geht zurück auf die Zahlung und verbucht sie wie vorgeschlagen gegen das Debitorenkonto.
In unserem Fall wurde jedoch 100% Vorkasse geleistet. Demnach kann das Angebot akzeptiert und die Lieferung eingeplant werden. Das geschieht durch den Knopf „Bestätigen“.
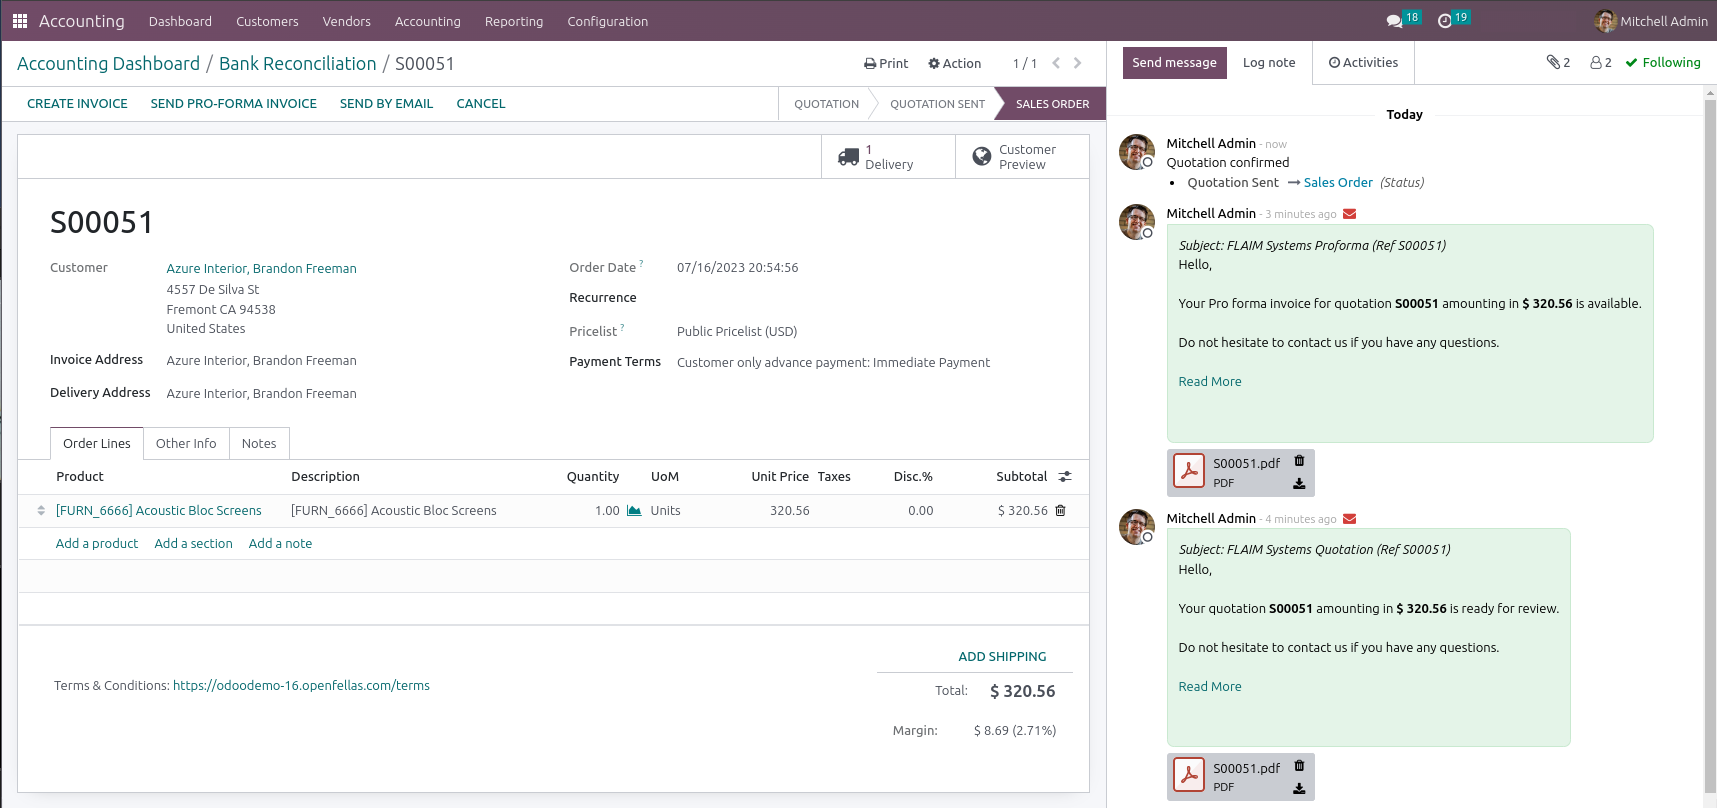
Nichts spricht dagegen, dass die Aktion durch einen Benutzer der Buchhaltung ausgelöst wird. Denn somit haben wir die Möglichkeit wie in Option 1 oben direkt eine Anzahlungsrechnung zu erstellen.
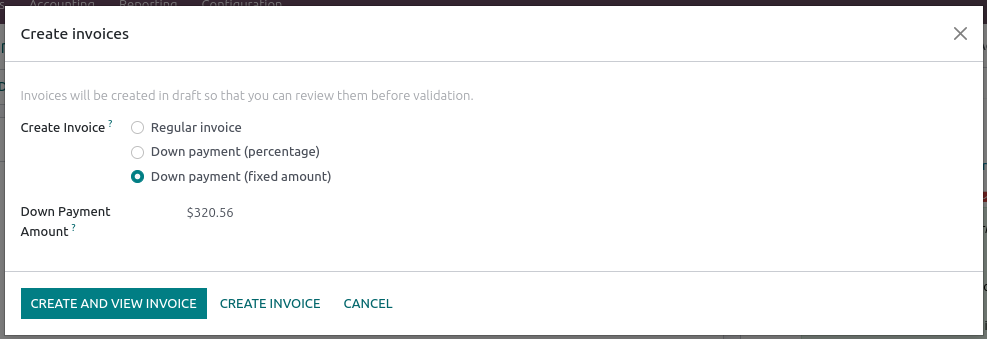
Schritt 4: Erstellung der Anzahlungsrechnung
Dieser Schritt weicht nicht von dem oben beschriebenen ab, außer dass wir hier keine prozentuale Anzahlung erfassen, sondern den bezahlten Betrag direkt eintragen. Diesen kann man über die Zwischenablage des Betriebssystems per Copy & Paste fehlerfrei übernehmen.
Schritt 5: Bestätigung und Versand der Anzahlungsrechnung
Damit wird die Anzahlungsrechnung generiert, die auch gleich bestätigt werden kann.
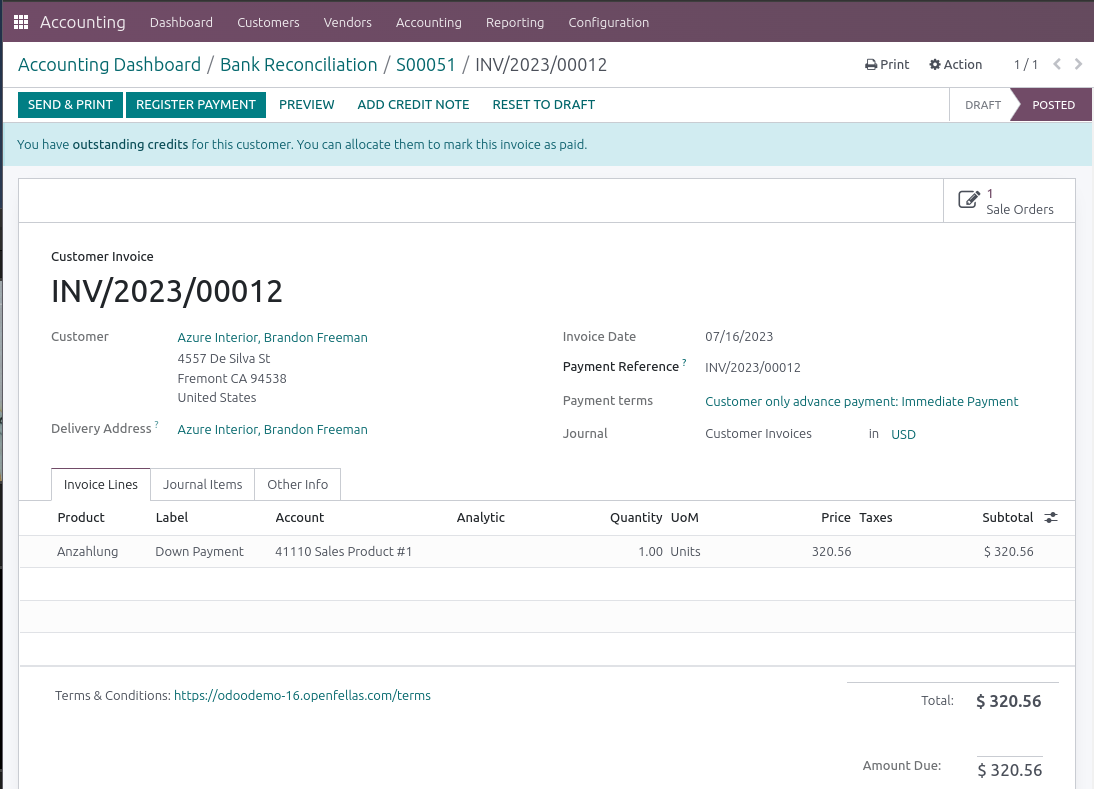
Natürlich können wir diese sofort an Azure versenden, doch die Frage ist, ob dies nicht praktischer durch die Auftragsbestätigung erfolgen kann, die so oder so ebenfalls zu verschicken ist. Falls der Rechnungsempfänger vom Beauftragenden abweicht, könnte das aber natürlich notwendig sein.
Schritt 6: Versand der Auftragsbestätigung
Wenn wir über die Breadcrumbs nun zum Auftrag zurückgehen, ist auch hier die Anzahlung im Auftrag vermerkt.
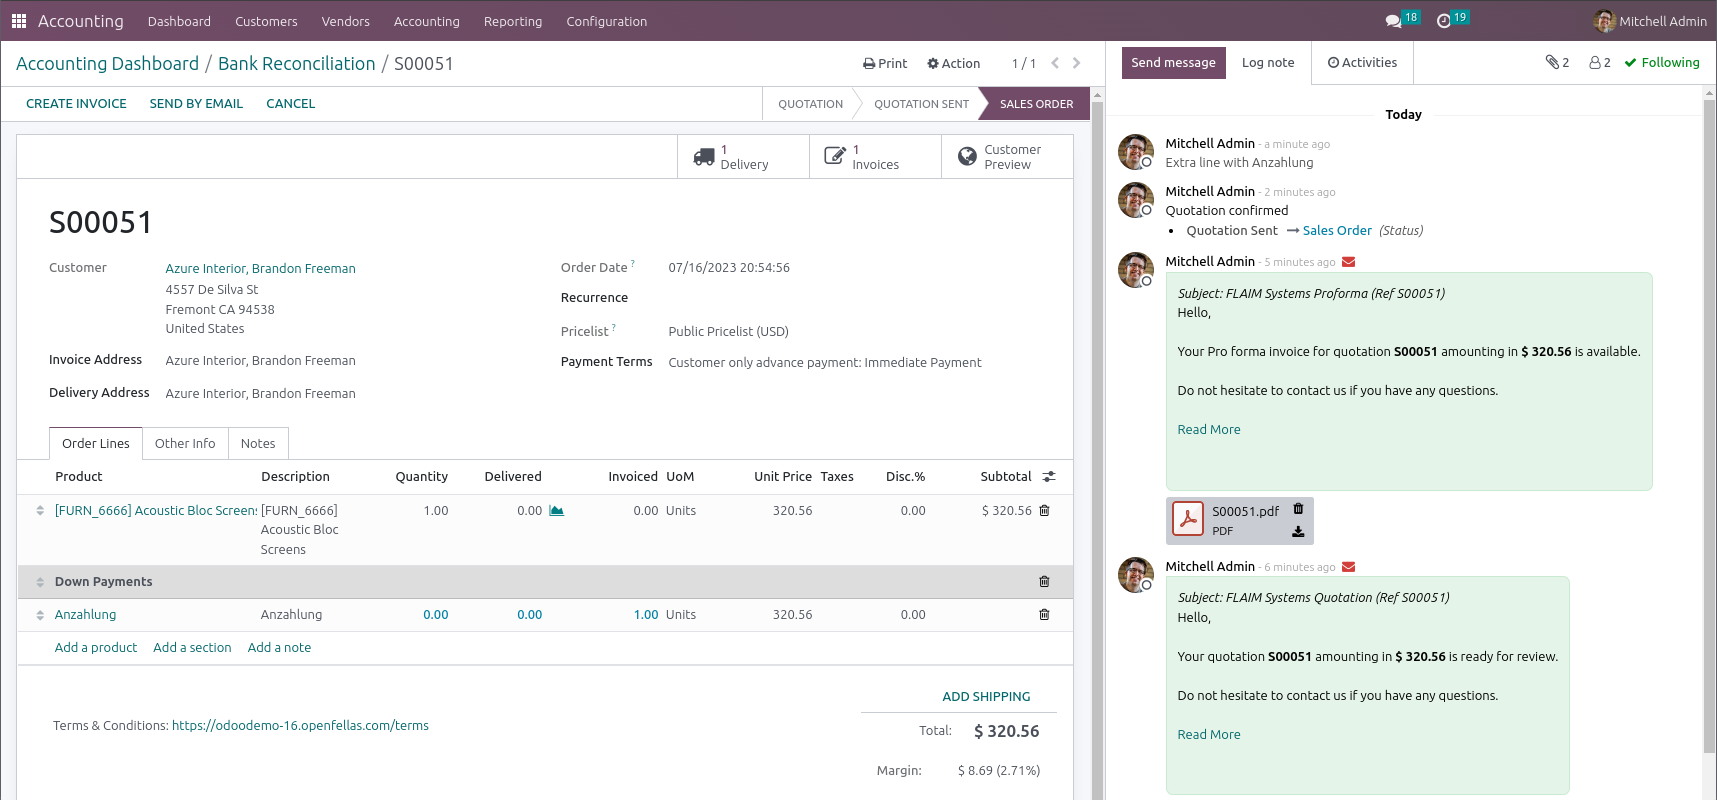
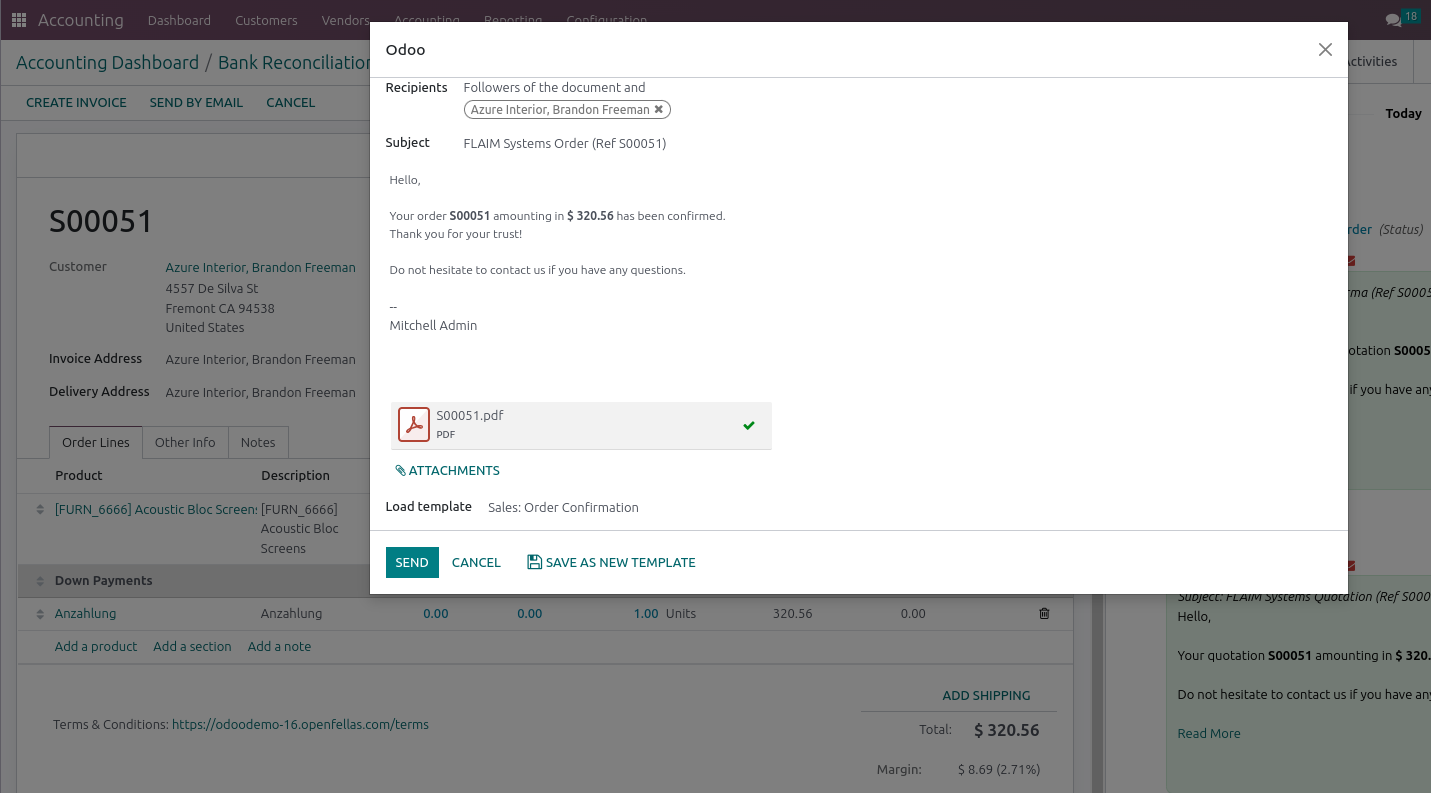
Hier sollte nun tatsächlich eine Auftragsbestätigung über den Knopf „Per E-Mail versenden“ an den Ansprechpartner gesendet werden, um die Anzahlung und den Liefertermin zu bestätigen.
Schritt 7: Verbuchung der Zahlung gegen die Anzahlungsrechnung
Nun gehen wir erneut über die Breadcrumbs zurück auf den Kontoauszug. Unter dem Reiter „Abstimmung vorhandener Einträge“ sehen wir dort unsere soeben erstellte Anzahlungsrechnung und können diese zur Abstimmung als Gegenbeleg auswählen.
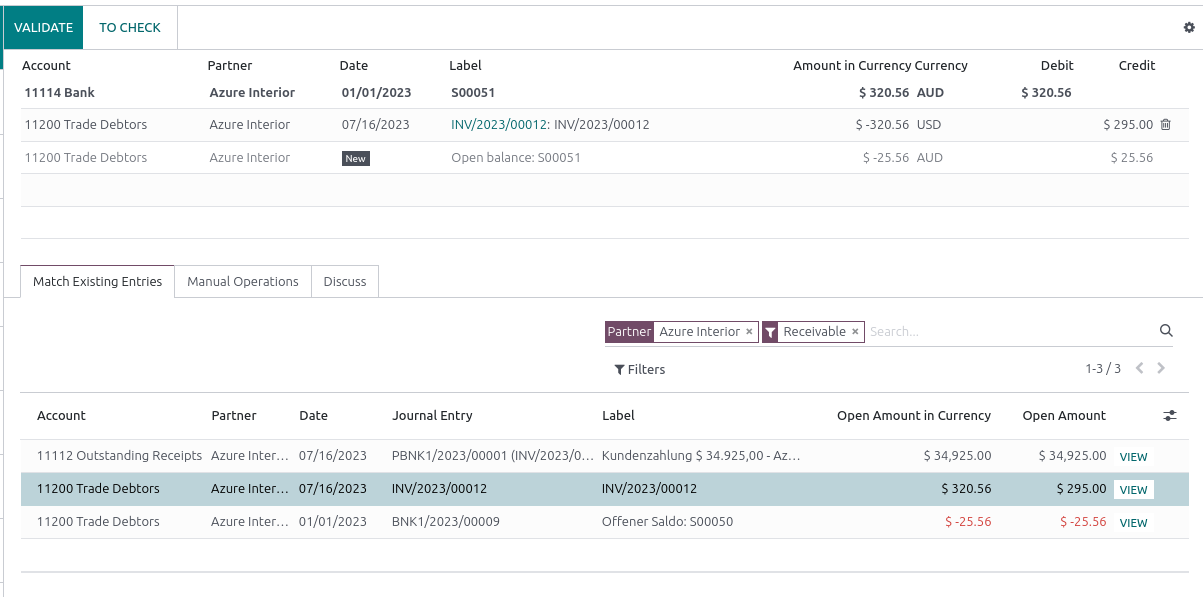
Wenn nun der Vorgang bestätigt wird, gilt die Anzahlungsrechnung als ausgeglichen.
Die nun folgenden Schritte weichen nicht von Option 1 ab. D.h., nach erfolgter Lieferung wird der Auftrag in den Rechnungslauf gestellt und die Anzahlung wird in der Abrechnung berücksichtigt. Der Saldo ist in unserem Fall entsprechend 0. Doch trotzdem ist die Kaufmannsrechnung dem Kunden zur Verfügung zu stellen.
Fazit
Natürlich lässt sich der Prozess um viele weitere Details erweitern. Auch sind in unserem Fall die Steuern komplett unberücksichtigt, d.h. bei der Erfassung des festen Betrags für die Anzahlungsrechnung war es einfach, da keine Steuern am Beleg herausgerechnet werden mussten. Dies und viele kleine Details mehr sollten natürlich beachtet werden.
Unser Beispiel sollte nur verdeutlichen, wie ein Vorgang prinzipiell in Odoo Standard abgewickelt werden kann. Natürlich erscheint es wie eine lange Klickstrecke, die bei vielen Vorkassen unangenehm wäre. Doch steht ein Prozess erst einmal und kennt man die entsprechenden Parameter, kann er im System programmatisch automatisiert werden.
Der noch offene Punkt ist, dass in unserem Beispiel in Option 2 die beauftragten Proforma-Angebote nicht angemahnt werden. In den meisten Fällen ist dies auch Teil des Prinzips, da es erst mit der Zahlung zur Willenserklärung des Kunden kommt. In Einzelfällen kann die Beauftragung jedoch schon als verbindliche Zusage gesehen werden. Dann sollte man einen Filter in der Angebotsübersicht erstellen, der alle versendeten Angebote danach filtert, ob eine Proforma-Mail versendet wurde und sie nach Alter der letzten Änderung gruppieren. Allerdings müssten diese dann über die Chatterbox des jeweiligen Vorgangs angemahnt werden, was halbautomatisch über eine entsprechende Mailvorlage geschehen kann.
War dieser Artikel hilfreich?
Dürften wir Sie bitten, uns eine Bewertung zu Ihren Erfahrungen mit openfellas zu hinterlassen?